How to Make a Mattress: A Practical DIY Guide
Learn how to make a mattress at home with a practical DIY guide covering core options, layering, covers, safety, and longevity.

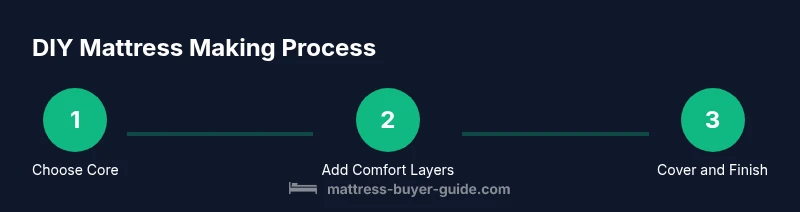
Want to make a mattress at home? This step-by-step guide covers choosing a core (foam, latex, or springs), layering comfort materials, and building a breathable cover. You’ll need basic cutting tools, foam or latex, fabric, a zipper, adhesive, and a sewing method. Follow safe handling and ventilation guidelines for best results, plus test firmness as you build.
Core Options: Foam, Latex, and Springs
Core choice forms the backbone of your DIY mattress. Foams range from soft to firm, offering contouring support and portability. Latex provides a responsive, buoyant feel with natural resilience, while innerspring cores deliver air flow and long-term durability. According to Mattress Buyer Guide, matching the core to your sleep profile matters most: side sleepers often benefit from contouring foams, back sleepers may prefer balanced support, and hot sleepers should prioritize breathable cores. Consider weight distribution, climate, and budget as you evaluate options. The right core sets the tone for comfort, durability, and sleep quality. It’s worth testing samples if you can, or starting with a modular approach so you can tweak firmness over time.
Layering for Comfort: From Core to Quilt
Layering turns a basic core into a personalized sleep surface. Start with a thin transition layer if the core is very firm, then add a thicker comfort layer for pressure relief. Memory foam or gel-infused foams can improve contouring and temperature management, while a natural latex layer adds bounce and durability. A quilted top or thin cover layer provides the first tactile feel and helps reduce motion transfer. When planning layers, ensure overall thickness stays within your target range and that each layer aligns with the mattress dimensions. Label each component for easy reconfiguration later.
Firmness, Support, and Sleep Position
Firmness is not a single number; it’s a feel that depends on your body weight and sleeping position. A heavier sleeper may perceive a medium-firm core as supportive, while a lighter sleeper might judge the same core as too soft. Side sleepers usually need deeper contouring to relieve shoulder and hip pressure, while back sleepers benefit from uniform support along the spine. If you sleep with a partner, consider a layered design that balances motion isolation with support. Use a simple firmness test by stacking materials in a temporary cover and lying down for several minutes before finalizing the core layout.
Choosing and Sizing Your Core Material
Your core sizing should match the standard mattress dimensions you want (twin, full, queen, king). Cut the core material slightly smaller than the final cover to allow for edge finishing and a snug fit. For foam or latex, plan for a uniform thickness across the surface to prevent soft spots. If you’re combining layers, ensure each interface sits flat and doesn’t produce gaps. For durability, choose density and resilience suitable for your weight and movement patterns, and avoid sharp cuts that create weak points at seams.
Designing a Breathable, Durable Cover
The cover protects the core and helps regulate temperature. Opt for breathable fabrics like natural cotton blends or moisture-wicking synthetics. A removable, washable cover simplifies maintenance and extends the life of your mattress. Ensure the cover fits securely around the edges with a zipper that’s easy to operate. If you’re concerned about allergens or dust mites, consider a tightly woven fabric and a lining that resists fiber migration. Good edge stitching and reinforced corners reduce wear where the layers meet the cover.
Assembly Basics: Cutting, Stacking, and Aligning
A precise cut is essential for even support. Use a straightedge and a sharp knife or a foam saw to achieve clean edges. Place the core on a flat, padded workspace, then carefully add transition and comfort layers in the intended order. Align all edges to avoid a stepped look, and smooth seams to prevent pressure points. If you’re stacking multiple materials, verify each layer sits flush before proceeding to the next. A simple mock-up in a temporary cover helps catch misalignments early.
Finishing Touches: Zippers, Seams, and Safety
Installing a zipper or a detachable cover is the final practical step. Use a zipper foot and a sturdy thread to ensure a clean, durable closure. Double-stitch the edges to prevent fraying. When working with adhesives or resin finishes, ensure proper ventilation and follow the product’s safety guidelines. Avoid placing sharp fasteners near any sleeping surface, and inspect all seams for loose threads. A well-sewn cover not only lasts longer but also improves edge stability.
Sizing, Weight, and Portability Considerations
A DIY mattress can be heavy, especially if you use dense foam or latex. Plan how you’ll move and rotate the mattress, and consider a removable cover to simplify handling. If you anticipate frequent shifting or transporting, modular designs that split into sections can be convenient. Weight distribution matters: heavier zones can influence wear patterns, so distribute materials evenly. Also think about future upgrades; a modular approach makes it easier to replace or upgrade layers without rebuilding the whole core.
Testing, Break-In Period, and Adjusting
After assembly, give the mattress a break-in period to settle and conform to your body. Test support by lying in your typical sleep position for 15–20 minutes, then reassess firmness and comfort. If you notice hotspots or sagging, adjust by adding a thinner or thicker layer in the affected area, or rearranging layer order. Keep a simple log of how the surface feels across different nights and temperatures to guide future tweaks. A well-tested mattress feels comfortable and stable over time.
Maintenance, Longevity, and When to Replace
Regular care extends a DIY mattress’ life. Rotate or flip layers if your design permits, wash the cover as needed, and keep the sleep surface dry and clean. Use a breathable cover to prevent heat buildup and reduce moisture exposure. If you observe persistent sagging, uncomfortable pressure points, or unusual odors, it may be time to refresh the top layers or replace the core. Document your build so you know when components reach the end of their useful life.
Tools & Materials
- Foam sheets or latex blocks(Core material; choose firmness and density to match sleep needs.)
- Breathable fabric cover or ticking(Fits core thickness; prefers natural or breathable blends.)
- Zipper for cover closure(Choose a length that matches edge perimeter.)
- Sharp utility knife or foam saw(For clean, straight cuts; use a straightedge.)
- Adhesive or spray contact cement(Use only in well-ventilated spaces; test compatibility with materials.)
- Sewing machine or hand-stitching supplies(Durable thread; consider a zipper foot for edges.)
- Measuring tape and marker(Accurate sizing prevents edge overhangs.)
- Safety gear (gloves, mask)(Protect hands and lungs during cutting and adhesive work.)
- Vacuum or lint roller(Keeps work surface free of dust and debris.)
- Temporary cover or scrap fabric(Helpful for prototypes and testing layer order.)
Steps
Estimated time: Total time: 6-8 hours
- 1
Define size and core choice
Outline your bed dimensions and select a core type based on sleep position, climate, and budget. This early decision guides all subsequent cuts and layer placements.
Tip: Draft a simple bill of materials before cutting. - 2
Cut the core to size
Mark precise dimensions on the core material and cut with a straightedge for clean edges. Ensure the piece sits flat on a workstation to prevent uneven layering.
Tip: Do test cuts on scrap material first to refine your technique. - 3
Add a transition layer
If using a very firm core, introduce a thinner transition layer to reduce pressure points. Align edges carefully to avoid a stepped surface.
Tip: Test with light fingertip pressure to feel the transition. - 4
Layer comfort materials
Place your primary comfort layer atop the core and then add any secondary foams. Verify firmness by pressing with your hand across the surface.
Tip: Label layers to avoid misordering during assembly. - 5
Prepare the cover
Cut the cover pieces to fit, then sew edges with reinforced seams. Install the zipper along one edge for easy removal and washing.
Tip: Pre-test the zipper with a fabric scrap to ensure smooth operation. - 6
Assemble and align
Slide the core and layers into the cover, smoothing any wrinkles. Check that all edges align evenly and that the surface is level.
Tip: Use a helper to minimize shifting during final placement. - 7
Seal edges and finish
Secure seams with a second stitch line, ensuring durability at stress points. Apply any edging trim if desired for aesthetics and extra support.
Tip: Double-stitch at corners for longevity. - 8
Cure and test
Allow any adhesives to cure in a ventilated area. Lie down and test firmness across sleep positions for 15–20 minutes, adjusting as needed.
Tip: Document impressions to guide future changes. - 9
Final care plan
Create a maintenance routine: removable cover washing, periodic rotation, and edge checks. Note when to revisit layers or replace components.
Tip: Schedule a quarterly check to catch wear early.
FAQ
Is it safe to DIY a mattress at home?
DIY mattress making is generally safe if you follow material safety guidelines, work in a ventilated area, and use proper tools. Avoid inhaling adhesives and ensure covers are non-toxic and washable. Start with a simple prototype before committing to a full build.
DIY mattress making is safe when you follow safety guidelines and use proper tools. Start small and test for comfort before finalizing.
What core materials work best for durability?
Durability varies by material and usage. Foam offers contouring; latex provides resilience; springs deliver airflow and longevity. Choose based on weight, sleeping position, and maintenance preferences.
Foam, latex, and springs each have strengths. Pick based on comfort, durability, and care needs.
How thick should a DIY mattress be?
Thickness depends on core choice and desired feel. Typical DIY assemblies range from 6 to 12 inches, but you can tailor it by adjusting layers. Ensure the final thickness fits your bed frame and standard bedding.
Most DIY mattresses end up between six and twelve inches, depending on layers and core.
How long will a DIY mattress take to cure or settle?
Cure times vary with materials and adhesives. Allow adhesives to fully cure in a ventilated space and test surface comfort after 24 hours to ensure stability.
Give adhesives time to cure, then test the surface after a day.
Can I reuse an old cover or should I start from scratch?
Using an old cover can save time, but fabric wear reduces durability and hygiene. A new cover ensures proper fit, breathability, and easier maintenance.
Reuse is possible, but a new cover usually performs better and is easier to clean.
What safety concerns should I consider with DIY mattresses?
Avoid sharp tools near sleeping surfaces and ensure proper ventilation when using adhesives. Follow manufacturer guidelines for materials and test for allergens.
Watch for ventilation and tool safety; test materials for allergies.
Watch Video
Highlights
- Plan core and layers before cutting
- Match core choice to sleep style and climate
- Use a breathable, washable cover
- Test firmness and adjust gradually
- Maintain the mattress with regular cover care