Clean Mattress Guide: Step-by-Step Cleaning for Sleep Hygiene
Learn how to clean a mattress safely with a practical, step-by-step guide covering stain removal, deodorizing, and drying for a fresher bed and longer life.

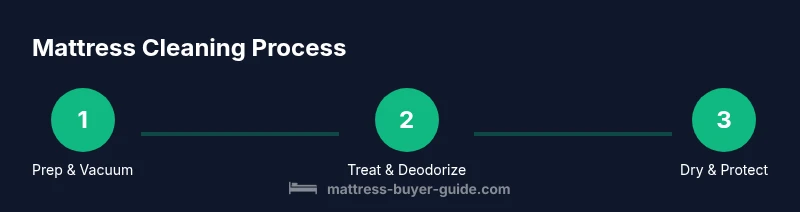
By following this guide, you will learn how to clean a mattress effectively, including stain removal, deodorizing, and drying techniques to restore freshness. You’ll need basic supplies and a clean, ventilated space. The steps are organized to minimize downtime and protect mattress materials, whether you have memory foam, latex, or innerspring models.
Why Clean Mattress Matters
According to Mattress Buyer Guide, maintaining a clean mattress is part of a proactive sleep hygiene routine. A clean mattress reduces exposure to dust mites, bacteria, and odors, supporting better sleep quality and longer mattress life. Over time, sweat, oils, and spills accumulate on the surface, seeping into seams if left untreated. Regular cleaning lowers allergen load and helps prevent mildew in humid rooms. For households with children or pets, keeping the mattress clean is essential for hygiene and comfort. This isn’t just about smell—it’s about preserving fabric integrity and the overall health of your sleep space. The goal is to create a neutral base that won’t trap moisture or foster microbial growth. A straightforward routine can make a big difference over the life of your bed.
In practical terms, cleaning a mattress doesn’t require industrial-grade products. Simple, gentle cleaners paired with proper drying methods are enough to keep most mattresses looking and feeling fresh. Remember: the best approach respects the mattress type and your room’s ventilation. With the right tools and a calm workspace, a clean mattress becomes a simple, repeatable task rather than a dreaded chore.
Tools & Materials You’ll Need
Before you start, gather supplies. Essential items include a vacuum with upholstery attachment, baking soda, an enzyme cleaner or mild detergent, a spray bottle, microfiber cloths, and a clean sheet or towels to protect surfaces. Optional items are a stain remover pen, white vinegar, a soft brush or old toothbrush, a fan or dehumidifier to speed drying, and a washable mattress protector for future maintenance. With everything at hand, you’ll move through the cleaning process faster and reduce the chance of re-dirtying surfaces. Always choose products that are labeled safe for your mattress type, especially for memory foam or latex cores.
Careful preparation supports a thorough clean and reduces the risk of over-wetting. If you’re unsure about a cleaner’s compatibility with your mattress, test it on a small, inconspicuous area first. This simple step protects against discoloration and ensures you can proceed with confidence. Finally, keep a trash bin nearby for quick disposal of lint, hair, and used wipes. Pro tip: designate a dedicated cleaning space near the bed to minimize the risk of spills elsewhere in the room.
Step-by-Step: Pre-Treating and Vacuuming
- Strip all bedding and launder it separately; clean sheets and pillowcases remove the most obvious sources of dirt and oils before you treat the mattress itself. 2) Vacuum the mattress surface using a low-suction setting and a upholstery nozzle to remove dust, dead skin cells, and hair. Work in overlapping passes and don’t neglect seams, edges, and corners where debris can accumulate. 3) If you spot stains, prepare a light cleaning solution and dab it onto a microfiber cloth rather than pouring directly onto the mattress. Blot gently from the outside in toward the center to avoid spreading. 4) Allow the treated area to dry briefly before moving on to deeper stain removal or deodorizing to minimize excessive moisture.
This phase sets the foundation for deeper stain work and freshening while protecting the fabric from being oversaturated. A clean surface also makes it easier to verify rest areas that may require targeted treatment. If you’re cleaning a high-traffic guest bed, consider performing this prep step on a day with drying assistance (fans or a window-enabled day).
Stain Removal Techniques for Common Spots
Stains on a mattress respond best to a targeted, patient approach. Protein-based stains (like blood or sweat) respond well to enzyme cleaners; apply a small amount to a cloth and blot instead of rubbing. For organic stains, a mild detergent solution can help break down residues; avoid soaking the fabric. For tougher marks, a white cloth dampened with a vinegar solution can help lift color, but always test first. Avoid using colored or scented cleaners that may leave residues or odors behind. For urine stains, act quickly: blot, apply an enzyme cleaner, and let it sit long enough for the enzymes to work, then blot again and air dry. Remember, the goal is to lift the stain without saturating the core.
When tackling stains, work from the outside edges inward to prevent spreading, and always finish with a light rinse or blot to remove cleaning residues. If you have memory foam, keep moisture low and avoid direct saturation; foams don’t dry as quickly as fabrics. For mixed fabrics or hybrid mattresses, treat only the surface layer and follow the manufacturer’s cleaning guidelines.
Deodorizing and Freshening Your Mattress
Deodorizing is a key step after stain removal. Sprinkle a light, even layer of baking soda over the entire surface and let it sit for 30 minutes to several hours, depending on air flow and room humidity. Baking soda absorbs odors and moisture without leaving a strong residue; vacuum thoroughly to remove all powder. For persistent odors, a short mist with a mild cleaner or a fabric-safe deodorizer can help, but avoid heavy fragrances that could irritate sensitive sleepers. Ensure the room is ventilated during this step to promote faster evaporation. A clean, dry mattress feels noticeably fresher and supports better sleep.
Drying, Curing, and Protection
Moisture is the biggest enemy of a clean mattress. Open windows or use a high-capacity fan to promote air movement across the surface. If possible, position the bed away from walls to encourage airflow on all sides. For slower drying environments, a dehumidifier can significantly speed up the process. Do not re-make the bed until the mattress is completely dry to prevent mold growth. Once dry, consider adding a breathable, washable mattress protector to simplify future cleanings and protect against future spills. Regularly airing out the mattress improves longevity and keeps the surface feeling fresh.
Cleaning Different Mattress Types: Memory Foam, Innerspring, Latex
Memory foam mattresses require careful moisture control; avoid soaking and use light-wipe cleaning methods with quick drying. Innerspring mattresses tolerate a bit more moisture but still benefit from light cleaning and full surface drying to prevent rust in the springs. Latex mattresses are naturally resistant to moisture but still benefit from surface cleaning and thorough drying. Always check the manufacturer’s care label for any warnings or restrictions. If you’re unsure, start with a small test area and proceed slowly. A well-maintained mattress supports better sleep quality across different core materials.
Maintenance Schedule and Long-Term Care
To minimize deep cleaning frequency, establish a simple maintenance plan. Wash bedding weekly or biweekly, vacuum the mattress monthly, and perform a deep clean every 6–12 months depending on usage, hydration in the room, and whether you have pets or kids. After cleaning, ensure the surface is completely dry before reusing. Regular use of a mattress protector can dramatically reduce the need for frequent thorough cleans and extend the mattress life. Aligning routine cleaning with seasonal changes helps keep odors and allergens at bay and supports a healthier sleep environment.
Tools & Materials
- Vacuum cleaner with upholstery attachment(to remove dust and hair from fabric surface)
- Baking soda(for deodorizing and moisture absorption)
- Enzyme cleaner or mild detergent(enzyme cleaner is best for protein stains)
- Spray bottle(dilute cleaners for controlled application)
- Microfiber cloths(for blotting and gentle lifting)
- White vinegar (optional)(odor neutralization in small amounts)
- Soft brush or old toothbrush (optional)(loosen spots without damage)
- Fan or dehumidifier (optional)(speed up drying)
- Mattress protector (optional)(for future protection)
- Protective gloves (optional)(keep hands clean during cleaning)
Steps
Estimated time: 90-120 minutes
- 1
Strip Bedding and Launder
Remove all sheets, covers, and pillowcases. Wash fabrics separately on a standard cycle with warm water and detergent to lift oils and soils before treating the mattress itself.
Tip: Clean linens first to prevent dirtying the mattress surface. - 2
Vacuum Mattress Surface
Use upholstery attachment to remove dust, hair, and skin flakes. Vacuum in straight, overlapping passes, pay attention to edges and seams where debris collects.
Tip: Take your time on corners; debris here causes uneven cleaning. - 3
Spot Treat Stains Lightly
Dampen a microfiber cloth with a mild cleaner or enzyme solution and blot stains from outside in. Avoid soaking; excessive moisture can harm foam or springs.
Tip: Test cleaner on a hidden area first. - 4
Deodorize with Baking Soda
Lightly dust baking soda across the surface and allow it to sit for 30 minutes to several hours. Vacuum thoroughly to remove all powder.
Tip: Ventilate well to speed up odor absorption. - 5
Address Odor Residues
If odors persist, apply a small amount of diluted cleaner to a cloth and wipe the surface, then blot and air-dry thoroughly.
Tip: Avoid heavy fragrances that may irritate sensitive sleepers. - 6
Drying Phase
Promote airflow with a fan or dehumidifier. Do not make the bed until completely dry to prevent mold growth.
Tip: Prolonged drying reduces chance of moisture retention. - 7
Reassemble Bedding
Once dry, replace clean bedding and consider a washable mattress protector for ongoing protection.
Tip: Choose breathable covers to aid future cleaning. - 8
Maintenance Check
Inspect the mattress monthly for stains or odors. Quick spot-clean as needed to avoid full cleans too often.
Tip: A quick weekly check keeps maintenance manageable.
FAQ
Can I use bleach on a mattress?
Bleach is generally not recommended for mattresses as it can damage fabrics and foam. Use water-based cleaners or enzyme cleaners for stains, and always spot-test first.
Bleach can damage the mattress materials, so avoid it and stick to gentler cleaners.
Is baking soda safe on memory foam?
Yes. Sprinkling baking soda helps absorb odors; vacuum it after about 30 minutes or longer for best results, especially on memory foam.
Yes—baking soda is safe on memory foam and helps deodorize.
How long does it take for a mattress to dry after cleaning?
Drying time varies with airflow and mattress type, but plan for several hours to overnight. Use fans to speed up the process and keep it dry.
Expect several hours to overnight for drying with good airflow.
Can I steam clean my mattress?
Steam cleaning can damage some mattress materials, particularly memory foam. Use damp cloths or spot cleaning instead and avoid direct steam.
Steam cleaning is usually not recommended for most mattresses.
How often should you clean a mattress?
Deep-clean a mattress every 6–12 months, and perform spot-cleaning as needed between cleans.
Most people clean their mattress every 6 to 12 months.
What should I do about urine stains?
Act quickly: blot, apply an enzyme cleaner, and allow to dry completely. Enzyme cleaners are effective for protein-based stains.
Act quickly, blot, and use an enzyme cleaner for urine stains.
Watch Video
Highlights
- Strip bedding, then clean surface thoroughly
- Use enzyme cleaners for organic stains
- Dry completely before reusing the bed
- Test cleaners before full application
- Protect the mattress with a protector going forward