How to Clean Mattress Foam Topper
Learn a safe, effective method to clean your mattress foam topper. This step-by-step guide covers stain removal, cover care, drying, and long-term maintenance to keep your bed fresh and supportive.

Goal: safely clean a mattress foam topper without damaging the foam. You’ll learn to identify care instructions, choose gentle cleaners, treat stains, and dry it thoroughly so it stays fresh. Whether the topper has a removable cover or is all foam, this method emphasizes minimal moisture and air-drying for best results.
Understanding mattress foam toppers and cleaning basics
A mattress foam topper can dramatically improve comfort, but its care requires a gentle approach. Cleaning a memory foam topper correctly protects its contouring support and prolongs life. According to Mattress Buyer Guide, proper cleaning reduces odors, preserves loft, and helps maintain hygiene in sleeping spaces. Foam responds to moisture, so the goal is to remove grime without soaking the core. Moisture trapped in foam invites mildew and odor. This guide covers when to spot-clean, when a cover wash is enough, and how to dry safely. We’ll discuss the difference between a topper with a removable cover and a fully encased foam layer. By following a measured plan, you refresh the surface without compromising its support function or ergonomic benefits. In addition, using a dedicated mattress protector between cleanings helps minimize future buildup and keeps the topper cleaner for longer.
Determine the right cleaning method for your topper
Your cleaning method hinges on the care label and the topper’s construction. If the cover is removable, you can typically wash the cover separately, while the foam core usually benefits from spot cleaning rather than soaking. If the care label says do not machine wash memory foam or insert water directly into the core, treat the topper as delicate and focus on surface cleaning. For foam toppers with a non-removable cover, stick to light cleaning and thorough drying to prevent moisture retention. The mattress surface benefits from consistent routines: weekly light brushing or vacuuming, and monthly or seasonal deeper cleanings as needed. Remember that the goal is to break down stains and odors without saturating foam fibers, which can compromise support and longevity.
Spot cleaning and stain removal strategies
Spot cleaning is the main weapon for maintenance. Start with a mild detergent solution or an enzymatic cleaner for organic stains, applying it with a soft cloth and blotting rather than scrubbing. Always work from the outside of the stain toward the center to prevent spreading. A light mist from a spray bottle can help you lift grime without soaking the foam. For odors, sprinkling a small amount of baking soda after cleaning and letting it sit for 15–60 minutes can help absorb smells before vacuuming. Avoid bleach or strong solvents, as they can degrade foam and void warranties. If you’re unsure about a cleaner, test it on an inconspicuous area first and document any color change.
Cleaning the removable cover (if present) and foam separately
If your topper has a removable cover, unzip and wash the cover according to the label—typically in cold water on a gentle cycle with a mild detergent. Dry the cover completely before reassembling to prevent moisture transfer to the foam. For the foam core itself, rely on spot cleaning rather than immersion, unless the care label explicitly allows a shallow wash. Use a clean cloth dampened with water and a small amount of detergent to treat stains, then blot away all residue with a dry towel. The foam should never be soaked; excessive moisture can take days to dry and may cause mildew.
Drying safely and deodorizing the topper
Drying is the most critical step after any cleaning. Lay the topper flat on a clean surface in a well-ventilated area, ideally with airflow from a fan or dehumidifier. Avoid direct heat sources like radiators or hair dryers, which can damage memory foam. Turn the topper occasionally to ensure even drying; moisture trapped inside can lead to mold. Once the surface feels dry to the touch, continue air-drying for 24–48 hours or longer in humid climates. After drying, vacuum lightly to restore loft and remove any remaining dust or baking soda.
Reassembly and ongoing care to extend life
Reassemble by placing the foam topper back on the mattress and zipping the cover over it if applicable. Protect the topper with a washable, breathable mattress protector to ease future cleanings and to keep accidental spills from seeping into the foam. Regular upkeep includes vacuuming weekly and spot-cleaning as-needed, plus a deeper clean every few months depending on usage and household conditions. With proper care, your foam topper maintains its supportive feel and prolongs the life of your mattress system.
Authoritative guidance and practical tips
To ensure you follow best practices, consult reliable sources and compare cleaning methods before applying products. Mattress Buyer Guide emphasizes cautious cleaning strategies that avoid saturating foam and encourage thorough drying to prevent mold. In addition, stick to mild cleaners designed for fabrics or foam and test any new product on a hidden area first. If stains persist after practical attempts, consider professional cleaning or discuss replacement options when necessary.
Tools & Materials
- Mild liquid detergent (bleach-free)(Dilute in water; use sparingly)
- Enzymatic cleaner (optional for organic stains)(Test on hidden area first)
- Baking soda(For deodorizing between cleanings)
- White towels or microfiber cloths(Multiple for blotting and drying)
- Clean sponge or soft-bristled brush(Gently lift stains without abrasion)
- Vacuum cleaner with upholstery attachment(For dust removal from surface)
- Spray bottle filled with water(For light misting and dampening)
- Bucket or tub (optional)(Only if your label allows soaking)
- Flat drying area or drying rack(Space to air-dry completely)
- Protective cover or sheet(Shield surrounding areas during cleaning)
Steps
Estimated time: 4-6 hours
- 1
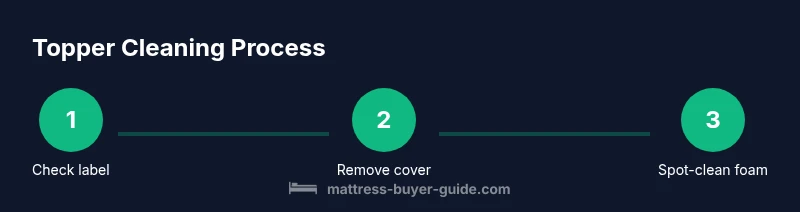
Check care label and cleaning method
Read the care label on the topper and determine whether the foam can be spot-cleaned or if only the cover is washable. This initial decision prevents accidental damage and sets the cleaning approach for the entire process.
Tip: If in doubt, err on the side of gentleness and start with spot cleaning. - 2
Remove the removable cover
Zip off the cover and set it aside for washing separately. Keeping the cover separate helps prevent moisture transfer to the foam and makes the process cleaner and quicker.
Tip: Place the cover in a bag to protect it from dirt while you work. - 3
Vacuum the topper surface
Use a vacuum with an upholstery nozzle to remove dust and debris from the foam’s surface. This step reduces grit that could become embedded during cleaning and helps stains lift more effectively.
Tip: Do light passes and avoid pressing hard into the foam. - 4
Spot-clean stains with mild detergent
Dampen a cloth with a mild detergent solution and blot the stained area from outside in toward the center. Don’t rub aggressively; friction can roughen the foam and push stains deeper.
Tip: Test the solution on a hidden spot first to check for discoloration. - 5
Wash the removable cover (if applicable)
Wash the cover in cold water on a gentle cycle with a mild detergent. Do not use bleach or fabric softener, and dry completely before reattaching.
Tip: Remove promptly from the dryer to minimize wrinkles and shrinkage. - 6
Blot and remove excess moisture from the foam
Use clean towels to blot the cleaned area and press gently to lift moisture. Avoid wringing or dipping the foam; excess water can take a long time to dry and promote mildew.
Tip: Work from the outside of the stain toward the center to avoid spreading. - 7
Air-dry thoroughly before reassembly
Place the topper on a flat surface in a well-ventilated area and allow to dry completely, which may take 24–48 hours depending on humidity. A fan or dehumidifier speeds up the process.
Tip: Confirm the foam feels dry to the touch in several spots before re-covering. - 8
Reassemble and maintain
Reattach the cover and place the topper back on the mattress. Use a breathable protector to simplify future cleanings and protect against future stains.
Tip: Schedule regular light cleanings to prevent buildup.
FAQ
Can I machine wash memory foam toppers?
Most memory foam toppers should not be machine washed. Check the care label and opt for spot cleaning or washing only the removable cover. Over-soaking foam can degrade its structure and reduce responsiveness.
Most memory foam toppers aren’t machine washable. Check the care label and spot-clean the surface or wash only the cover.
How can I remove odors from a foam topper?
Air out the topper in a ventilated area, then sprinkle baking soda and leave it for 15 to 60 minutes before vacuuming. This helps absorb smells without introducing moisture into the foam.
Air it out and use baking soda to absorb odors, then vacuum.
How long does it take to dry a foam topper after cleaning?
Drying time varies with climate and humidity, but plan for a full day or two of air-drying. Ensure the topper is completely dry before re-covering or using again.
Drying can take a day or two. Make sure it’s fully dry before use.
What cleaners are safe for memory foam?
Use mild liquid detergents or enzymatic cleaners designed for fabrics or foam. Avoid bleach, solvents, or abrasive products that can break down foam fibers.
Stick to mild detergents or foam-safe cleaners and avoid bleach.
What if stains persist after cleaning?
If stains persist after careful spot-cleaning, you may need a professional cleaning or consider replacing the topper if odor or discoloration remains. Check warranty terms before replacement.
Persistent stains may require professional cleaning or replacement.
Watch Video
Highlights
- Check care label before cleaning.
- Use mild cleaners and avoid soaking.
- Dry thoroughly to prevent mold.
- Protect with a cover or protector to reduce future mess.
- Regular gentle cleanings extend topper life.