How to Mattress Stitch: A Complete Guide
Master the art of joining knitted edges with the mattress stitch. This step-by-step guide covers definitions, techniques, troubleshooting, and tips for near-invisible seams in knitting projects.

In this guide on how to mattress stitch, you’ll learn to join knitted edges invisibly using a ladder-like seam. You’ll get a clear, step-by-step approach, plus tips to maintain even tension and hide yarn tails. By the end, you’ll be able to sew seamless joins on sweaters, scarves, and blankets with confidence.
What is the Mattress Stitch?
The mattress stitch is a specialized seam used to join the edges of knitted fabrics so that the join becomes virtually invisible on the right side. When you learn how to mattress stitch, you practice feeding yarn through the edge stitches from each side rather than sewing through both fabrics as a separate layer. This produces a tidy, flexible seam that blends with the knitting’s drape. According to Mattress Buyer Guide, success comes from consistent tension, careful edge alignment, and hiding the yarn tails. This guide provides a practical, field-tested path from prep to finish, with emphasis on real-world projects like sweaters, scarves, and blankets. With practice, the seam feels like a natural extension of your knitting rather than an external addition, allowing the garment to maintain its stitch definition and flow.
Why the seam matters
A well-executed mattress stitch preserves the fabric’s elasticity and line. It avoids puckering and keeps the seam from distorting the garment’s silhouette. Because you work through the edge stitches, the seam lies flat and follows the fabric’s natural curl, which is especially important for lightweight stockinette edges. The technique is versatile enough to handle small items like mittens or large pieces like afghans, and it scales with your skill. The key is patient, methodical work and regular checks that both sides align perfectly at each step.
When to use mattress stitch
You’ll reach for mattress stitch any time you want a clean, unobtrusive join between knitted panels. It’s ideal for garment waistbands, sleeve caps, and side seams, especially when the knit edges are uniform and the yarn color matches. It also works well for garter-stitch edges, where the slight ridges can be matched with careful placement. A common scenario is joining two rectangles to form a cardigan back or sleeve panel; the seam remains comfortable and flexible, allowing the fabric to move naturally with wear. In skilled hands, this seam is almost indistinguishable from the rest of the fabric.
Common Mistakes to Avoid
Rushing the process leads to visible ladders and gaps. Uneven tension creates puckers along the seam, and skipping edge stitches can leave the join loose. Make sure both edges are well aligned before you begin, and keep your working yarn flat and untwisted. If you notice a slight curl pulling toward the seam, backtrack one or two stitches and rework that area with lighter tension. Small errors are not the end of the world; they’re opportunities to refine your technique and better match your knitting style. Remember to weave in tails securely to prevent a loose thread catching on future washes.
Tension, Alignment, and Visibility
The elegant mattress stitch hinges on equal tension and precise alignment. Hold the fabric flat and parallel as you work, adjusting grip so the seam doesn’t slip. Keep the ladder of the seam narrow by stitching under the same relative position on each side. A common tip is to work with a length of yarn that’s long enough to complete a substantial portion of the seam without rethreading, then thread a fresh length for the tail end. This approach reduces the risk of uneven tension and improves the seam’s invisibility.
Advanced Techniques for a Near-Invisible Finish
For experienced knitters, subtle refinements make a big difference. Use a slightly longer ladder on the initial passes, then tighten gradually as you approach the end of the seam. When concealing ends, use a tiny, nearly invisible knot inside the seam line or weave the end through several nearby stitches to hide it completely. Lighting matters; a well-lit workspace helps you spot and correct misalignments early. Practicing on a small swatch before committing to a garment accelerates mastery and builds confidence.
Practice and Real-World Projects
Begin with a simple swatch in stockinette or garter stitch to internalize the rhythm. Once comfortable, try a sweater sleeve seam or the side panels of a baby blanket. Practice reveals how the seam behaves with different fibers and yarn weights. In real projects, you’ll notice the seam’s behavior changes with fiber—merino vs. cotton may require tiny tension adjustments. Over time, you’ll intuit where the seam should sit for the most seamless look and how to adjust your grip for smooth movement across the fabric.
Maintenance and Care of Knit Seams
Even the best mattress stitch benefits from proper care. Wash knitted items in accordance with fiber guidance, and avoid harsh agitation that could loosen edges. If you see slight pilling or edge curl after washing, gently re-block the fabric and reshape seams to restore alignment. The seam is resilient, but consistent care extends the life of the join and preserves the garment’s overall look. With this approach, your stitches stay neat for years of wear.
Tools & Materials
- Darning needle or tapestry needle(Size suitable for yarn; a blunt tip reduces snag risk)
- Matching yarn or sewing thread(Coordinate with knit color and fiber)
- Stitch markers(Use to mark seam positions and edge stitches)
- Scissors(Small, sharp scissors for clean tails)
- Tail-saving tool (optional)(Clover-type thread cutter or needle threader can help)
- Good lighting(Bright, neutral light to see edge stitches clearly)
Steps
Estimated time: 20-40 minutes
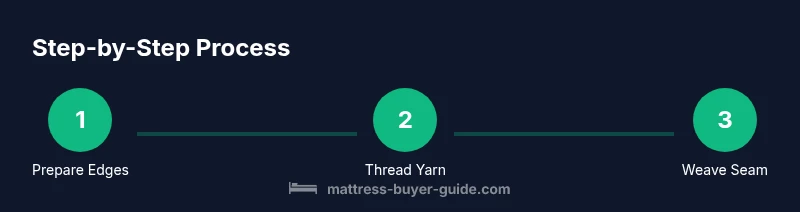
- 1
Prepare and align edges
Lay the pieces with edges even and mark the seam line. Ensure right sides face each other if your pattern requires it, and align at the corners before starting. This alignment minimizes shifts as you begin the stitch.
Tip: Use a light-colored yarn for the initial run to clearly see the edge stitches. - 2
Thread a long piece of yarn
Thread the tapestry needle with a length about 5–6 times the intended seam length. Tie a secure starting knot if you prefer extra security, but leave a tail long enough to weave in later.
Tip: Avoid over-trimming the tail—leave enough length to anchor to prevent slippage. - 3
Anchor at the bottom edge
Insert the needle from the back to the front at the bottom edge stitch on one side, catching only the edge stitch. Bring a corresponding edge stitch from the opposite side into the needle path on the same course.
Tip: Keep the initial insertion shallow to prevent creating visible loops. - 4
Weave the first ladder
Pull the yarn through to form the first small ladder. Repeat by catching the next edge stitch on the opposite side, alternating sides as you go up the seam.
Tip: Maintain a consistent distance from the edge to keep the seam straight. - 5
Continue along the seam
Continue pulling the needle through edge stitches on alternate sides, ensuring you do not pull too tightly. Your goal is a smooth, flat seam with a subtle ladder in between.
Tip: Pause occasionally to check that both edges align and there are no gathered sections. - 6
Finish the seam
When you reach the end, secure the last few stitches and bring the tail through the seam to hide it. Weave the tail in on the wrong side of the fabric so it cannot snag or unwind.
Tip: Leave a tiny gap at the final stitches to avoid forming a tight knot that would pucker. - 7
Trim and secure ends
Trim tails close to the fabric after weaving them in. If you have multiple joins, repeat the process for each seam and then re-check the entire piece for uniform tension.
Tip: Use a thread-cutting motion parallel to the seam to minimize fraying. - 8
Block and evaluate
Gently block or lightly press the knitted piece to settle the seam. Check both sides of the fabric to ensure the seam lies flat and the stitches flow without distortion.
Tip: Blocking helps set the seam and minimizes slight tensions after wear or washing.
FAQ
What is mattress stitch and what makes it different from other seams?
Mattress stitch is a seam technique that joins knitted edges by weaving through edge stitches from each side, producing a nearly invisible seam on the right side. It differs from standard mattress seam by focusing on edge stitches rather than stitching through the fabric. The result is a flexible, drapey join that blends with the fabric.
Mattress stitch joins edges through edge stitches from both sides for a nearly invisible seam, giving a clean finish to knitted pieces.
When should I use mattress stitch instead of sewing with a separate thread?
Use mattress stitch when you want a seamless join that follows the fabric’s drape. It’s ideal for garment side seams, sleeves, and panel joins where a visible seam would be undesirable.
Use mattress stitch when you want an invisible seam that follows the fabric’s drape, perfect for knit garments.
Can mattress stitch be used on garter stitch or ribbing?
Yes, it can be used on garter stitch and ribbing, but you may need to adjust tension slightly to account for the stitch texture. Practice on swatches to see how the texture affects invisibility.
You can use it on garter or ribbing with small tension tweaks; test on swatches first.
Why does my seam look ladder-like or bumpy?
Ladders indicate uneven tension or misaligned edge stitches. Recheck edge alignment, go back a few stitches, and rework with a lighter touch. Blocking can also help even out minor irregularities.
Ladders usually mean uneven tension; fix by realigning stitches and reworking the area with gentler tension.
How do I finish the seam and hide the yarn ends?
Finish by weaving the yarn tails into the seam and surrounding stitches on the wrong side. Trim close to the fabric after weaving to prevent irritation or snagging.
Weave the ends into the seam and trim close so they stay hidden and secure.
Watch Video
Highlights
- Learn the mattress stitch basics and why it creates invisible seams
- Maintain consistent edge alignment and tension for best results
- Practice on swatches before tackling full garments
- Weave in tails securely and block the fabric to set the seam