Should Mattresses Be Vacuumed? A Practical Guide
Discover whether vacuuming a mattress is worthwhile, how to do it safely, and when to rely on other cleaning methods. Mattress Buyer Guide breaks down best practices for all mattress types and scenarios.

Vacuuming your mattress is a practical surface cleaning step that helps reduce visible dust, pollen, and skin cells. It shouldn’t be your only cleaning method, but regular vacuuming, using a brush upholstery attachment, can improve freshness and allergen control. It won’t sanitize or remove deep odors, so combine with airing and occasional spot cleaning as needed.
Should vacuuming be part of mattress care? The quick answer guides the approach
Vacuuming a mattress is a focused, surface-level cleaning step. It helps remove loose debris like dust, dead skin cells, and pollen that settle on the fabric over time. While it cannot replace a full cleaning regime, including airing and occasional stain treatment, it is a practical habit for homeowners who want to reduce visible grime and improve overall freshness. According to Mattress Buyer Guide, regular surface cleaning contributes to a cleaner sleeping environment and can modestly lower allergen load on the mattress surface. This makes vacuuming a sensible component of a larger care routine rather than a standalone cure. The goal is not to sanitize the core materials but to keep the top layers clean and comfortable for nightly use.
In short, vacuuming matters for upkeep, but manage expectations: it does not disinfect or “renew” a mattress. Use it alongside air exposure, protectors, and timely stain treatment for the best long-term results.
Dust management and allergen control on the mattress surface
Dust and skin cells accumulate on mattresses, especially if you sleep with shedding skin and in a dusty room. Vacuuming the top surface with a suitable attachment reduces visible dust and can lower the amount of allergen-laden debris that accumulates in fabric fibers. This is particularly helpful for households with allergy or asthma concerns, where even small reductions in particulate matter can improve comfort. Regular vacuuming may also extend the lifespan of the fabric by removing gritty particles that can abrade the surface over time. It’s important to use the right attachments and a gentle, steady pass to avoid pushing debris deeper into seams or stitching. Mattress care should pair surface cleaning with proper ventilation and periodic protector use to keep fibers fresh longer.
Myths and limitations: what vacuuming can and cannot do
A common myth is that vacuuming alone can sanitize a mattress or eliminate deep-seated odors. Vacuuming targets loose surface matter, not embedded stains, body oils, or microorganisms beyond the fabric’s surface. It also cannot restore a mattress that is sagging, lumpy, or structurally compromised. For odors, simply vacuuming will be insufficient; airing out the bed, using baking soda as a deodorizer, and spot-cleaning with appropriate solutions are typically more effective. Mattress cleaning strategies should be layered: vacuum for surface cleanliness, air for freshness, protect with a cover, and address stains promptly. This multi-pronged approach aligns with best practices from Mattress Buyer Guide and reduces the chance of recurring odor or grime.
How to prepare your mattress for vacuuming
Before you begin, strip the bed and wash or replace bedding to avoid transferring dirt. Move the mattress onto a clean, dry surface if possible, and pat down any loose fibers around the edges to prevent dust from escaping into the room. Inspect the fabric for loose threads or damage; vacuuming a damaged area can worsen wear. If you have an adjustable bed frame or heavy mattress, consider moving the task to a room with ample space and a hard, level floor. Finally, ensure your vacuum is functioning properly, with a clean filter and adequate suction, and attach a suitable upholstery tool to maximize surface contact without grinding fabric.
How to vacuum: step-by-step approach and attachments
To maximize effectiveness, use a vacuum with a dedicated upholstery tool or a brush attachment. The attachment allows you to sweep the fabric in slow, overlapping motions, starting from the top surface, moving to the sides, and then the foot and head areas. Avoid pressing hard, which can pull threads or push debris deeper. For tufted or quilted areas, use light strokes and reach into seams with the crevice tool if necessary. After vacuuming, allow the mattress to air for a short period before bed to ensure any residual moisture evaporates. If you notice persistent odors, a light sprinkle of baking soda followed by a brief vacuum can help.
Tools and materials you’ll need for mattress vacuuming
- Vacuum with upholstery brush attachment (essential)
- Crevice tool for seams (optional but helpful)
- Microfiber cloths for spot cleaning (recommended)
- Mild cleaning solution or water for spot treatment (optional)
- Baking soda for deodorizing (optional, use sparingly)
Having these items ready ensures a smooth cleaning session and minimizes the risk of spreading dirt around the room.
Mattress types and vacuuming considerations
Different mattress constructions respond differently to cleaning; memory foam tends to be more delicate than traditional innerspring surfaces. For memory foam, use the vacuum in a light touch, avoiding overly aggressive suction that could compress the foam. For latex or hybrid mattresses, the fabric surface is typically more forgiving, but you still want to avoid dampness that could affect internal layers. Always check the manufacturer’s care label for any mattress-specific warnings, and if in doubt, test a small, inconspicuous area first. The goal is to maintain fabric cleanliness without compromising the underlying materials.
Cleaning frequency and routine integration
How often you vacuum depends on room environment, bedding hygiene, and personal sensitivity to dust. A practical baseline is to vacuum the mattress surface every 2-4 weeks, or more often in high-dust or pet-friendly households. Pair vacuuming with a breathable mattress protector, which helps trap dust and allergens before they reach the fabric. Regularly washing bedding and airing the mattress during warmer months also contributes to a cleaner sleeping surface. Mattress Buyer Guide recommends building a routine that integrates vacuuming with seasonal care cycles for consistency and better results.
Alternatives and complements to vacuuming
Vacuuming should be part of a broader cleaning strategy. For deodorizing, sprinkle baking soda on a dry mattress, wait 15-60 minutes, then vacuum again. If odors persist, consider surface cleaning with a mild, fabric-safe cleaner and a damp cloth, followed by thorough drying. Steam cleaning can be effective for some materials but may not be suitable for all mattress types; always consult the care label and consider professional services for stubborn stains. Pair these methods with a high-quality mattress protector to minimize future soil buildup.
Final tips for long-term mattress cleanliness
- Enforce a regular cleaning cadence and protect with a durable, breathable cover.
- Vacuum with even strokes, avoiding heavy pressure on seams and edges.
- Air out the mattress after cleaning to prevent moisture buildup, which can lead to mold or mildew.
- Consider seasonal deep cleanings and weather-appropriate care (open windows in dry months).
- Use mattress-specific guidelines from trusted sources like Mattress Buyer Guide to avoid unintended damage.
Tools & Materials
- Vacuum with upholstery attachment(Canister or upright with brush attachment; set to fabric-friendly setting; HEPA filter preferred)
- Crevice tool(For seams and tufted areas)
- Microfiber cloths(For spot cleaning and dusting edges)
- Mild spot-cleaning solution(Water and gentle soap or fabric-safe cleaner)
- Baking soda(Deodorizing; use sparingly and vacuum after 15–60 minutes)
- Spray bottle(For applying minimal moisture to spots)
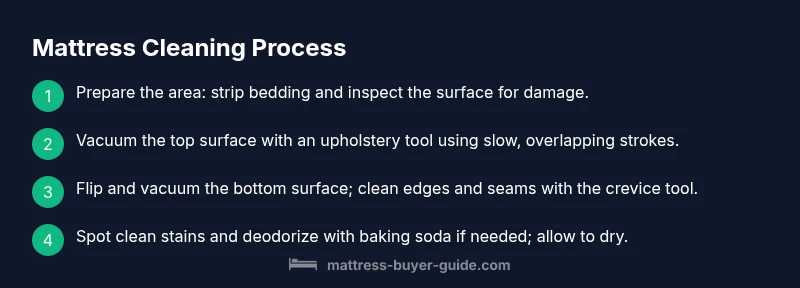
Steps
Estimated time: 30-45 minutes
- 1
Clear the area and prep
Remove all bedding and pillows. Strip the bed and place the mattress on a clean, dry surface. Inspect for tears or loose threads, as rough handling can worsen damage. This preparation reduces the spread of dust and improves suction efficiency.
Tip: Have a trash bag handy to collect dust and lint during the process. - 2
Attach the right tool
Attach the upholstery brush to your vacuum or use the crevice tool for seams. A soft brush helps lift surface fibers without grinding dirt deeper into the fabric.
Tip: Test a small area first to ensure no surface discoloration occurs. - 3
Vacuum the top surface
Using broad, overlapping strokes, vacuum the entire top surface from head to foot. Work slowly to pull loose dust and skin cells into the vacuum. Avoid pressing hard on the fabric to prevent compressing the material.
Tip: Move in straight lines, not circular motions, for consistent suction. - 4
address edges and seams
Switch to the crevice tool to clean edges, stitching lines, and tufted sections. Dust tends to accumulate in these areas and can be missed by the broad nozzle.
Tip: Use short, deliberate passes to avoid pushing debris into folds. - 5
Flip and repeat
Carefully flip the mattress and repeat the same vacuuming pattern on the bottom surface. Be cautious with heavier mattresses; seek assistance if needed to avoid strain.
Tip: Support the mattress during flipping to prevent bending or bending in unintended places. - 6
Spot cleaning and deodorizing
Treat any visible stains with a mild spot cleaner using a microfiber cloth. If odors remain, lightly sprinkle baking soda, wait up to 60 minutes, then vacuum again.
Tip: Avoid soaking the fabric; moisture can seep into inner layers. - 7
Dry and air out
Return the mattress to the frame, reassemble bedding, and allow airflow for a short period to ensure any moisture evaporates. This helps prevent mildew formation on damp fabrics.
Tip: Open windows or use a fan to accelerate drying. - 8
Post-clean maintenance
Install a breathable mattress protector and establish a vacuum routine every 2–4 weeks based on environment. Regular protection reduces future soil buildup.
Tip: If you own pets or live in a dusty area, more frequent cleaning may be beneficial.
FAQ
How often should you vacuum a mattress?
A practical baseline is every 2–4 weeks, more often in dusty environments or with pets. This keeps surface debris at bay and supports overall cleanliness when paired with protective covers.
Vacuum a mattress about every two to four weeks, adjusting for pets or dustier rooms.
Is vacuuming safe for memory foam?
Yes, but use a gentle setting and a soft upholstery attachment to avoid compressing the foam. Vacuum in light, even strokes and avoid soaking the material with moisture.
Yes, but use a gentle setting and avoid soaking memory foam.
Should you vacuum before bed or after removing sheets?
Vacuum after removing sheets and bedding so you can access the entire surface. This also prevents transferring dirt to clean areas and allows for faster drying after any spot cleaning.
Vacuum after you strip the bed for full access.
Can vacuuming replace washing bedding?
No. Vacuuming cleans the surface, while washing bedding removes sweat, oils, and microbes from fabrics. Combine both for a healthier sleep environment.
No—vacuuming and washing bedding serve different purposes.
What if there are bed bugs on the mattress?
Vacuuming alone is unlikely to eliminate bed bugs. Use heat treatment, professional inspection, or certified pest control methods for infested mattresses, and seal or replace affected bedding.
Vacuuming isn’t a stand-alone solution for bed bugs; seek professional help.
Watch Video
Highlights
- Vacuuming supports surface cleanliness, not full disinfection.
- Use proper attachments and gentle strokes to protect fabric.
- Layer cleaning with airing, deodorizing, and protective covers.
- Different mattress types require tailored care.
- Establish a regular vacuuming schedule for best results.