Why Is My Air Mattress Not Blowing Up? A Step-by-Step Troubleshooting Guide
Urgent, step-by-step guide to diagnose and fix an air mattress that won't inflate. Learn leaks, pump checks, valve fixes, and prevention tips from Mattress Buyer Guide.

Most often, an air mattress won't inflate due to a tiny leak, a faulty pump, or an unsealed valve. Begin by confirming the pump is powered, listening for leaks, and inspecting seams and the valve area. If you locate a leak, patch or replace the damaged part, and re-inflate slowly to confirm full pressure. Also check the pressure release valve for obstructions.
Why an air mattress won't inflate: common culprits
For many shoppers, the question 'why is my air mattress not blowing up' points to leaks, a failing pump, or an unsealed valve. If you notice slow inflation, listen for a hiss, or feel air at seams, a leak is likely. Inspect the seams, the valve edge, the pump connection, and the hose for signs of wear. Small punctures can be invisible; use a soapy-water test to spotlight them. A faulty pump is another frequent cause; confirm the outlet works, the cord is intact, and the hose is fully seated. Finally, ensure the valve seals tightly; even a tiny gap can stop inflation. Mattress Buyer Guide Analysis, 2026 confirms that leaks first, then pump or valve issues, as the most common paths to a no-fill situation. Once you locate the culprit, patch or replace the faulty component and re-test until you reach adequate firmness. The Mattress Buyer Guide team emphasizes acting quickly to restore a safe, comfortable sleep surface.
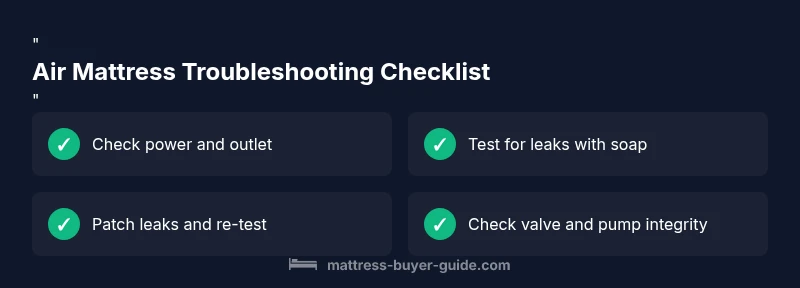
Quick diagnostic checklist you can do at home
- Power status: Make sure the outlet is live and the pump switch is on. If possible, try a different outlet or adapter to rule out power issues.
- Visual leak search: Inspect seams, valve edges, and pump connections. A soap-water test will reveal bubbles where air escapes.
- Valve integrity: Confirm the valve is fully closed and seated; a misalignment can let air escape.
- Pump performance: Listen for motor noise, check for overheating, and ensure the hose is firmly connected.
- Inflation target: Know your mattress's recommended firmness and test by pressing on the surface to gauge rebound.
- Safety check: If you hear continuous hissing after patching, re-evaluate the leak area rather than forcing more air in.
According to Mattress Buyer Guide, following this orderly checklist increases the likelihood of identifying the root cause without unnecessary disassembly. If the mattress still won’t hold air after these steps, proceed to the diagnostic flow for a structured path toward repair or replacement.
Interpreting symptoms: symptom-to-diagnosis-to-action
Symptoms guide your next moves. Slow inflation often signals a leak or valve issue; a pump that refuses to start points to power or motor problems. Sudden rapid deflation implies a puncture or seam tear; a weak or intermittent pump may need replacement. Use a systematic approach: confirm power, listen for air leaks, test seams and valves, then decide between patching, pump replacement, or mattress replacement. This method minimizes guesswork and speeds up a durable fix.
Step-by-step fix for the most common cause: small leak
The most frequent repairable issue is a small leak. Begin by locating the leak with a soap-water test and mark the area. Dry the surface, then apply a patch from a compatible air-mattress repair kit on both sides for a durable seal. Allow the patch to cure according to the kit instructions before re-inflating slowly and rechecking for air loss. If the leak reappears, reapply or consider a secondary patch method or round patch for extra security. After patching, test the mattress under gentle pressure to ensure stability and comfort.
Patch kits, pump choices, and how to select the right support system
Patch kits vary by material and adhesive type, so choose one compatible with your mattress fabric and seam type. If the pump is old or inconsistent, compare replacement pumps with the original model or opt for a universal high-output pump with an appropriate nozzle. For frequent deflation issues, consider a valve replacement kit or a new mattress with improved seams and reinforced edges. In all cases, verify compatibility with your mattress size and warranty terms before proceeding.
Maintenance and prevention: keep inflation ready for travel or guests
Regular inspection is your best defense. Check seams for wear every few months, keep patches clean and dry, and store the mattress unassembled in a cool, dry place. When inflating, use the recommended speed—over-inflation stresses seams and valves. If you store the mattress folded, rotate folds to prevent creases at critical points. Finally, guard against sharp objects and pets that might puncture the surface during storage or use.
When to replace: durability, warranty coverage, and lifecycle tips
If leaks recur after patches or if the mattress loses air rapidly despite repairs, it may be time to replace. Review your warranty terms for coverage on seams, valves, and pump components; some brands offer replacement parts instead of whole mattresses. Consider model longevity and user reviews on durability when choosing a new unit, especially for high-use rooms or frequent travelers.
Steps
Estimated time: 40-60 minutes
- 1
Confirm power and pump readiness
Plug the pump into a known-good outlet and switch it on. Listen for the motor running and observe any indicator lights. If there’s no response, try a different outlet or adapter. Ensure the cord and plug are dry and intact.
Tip: Test multiple outlets to rule out a local outlet issue. - 2
Inspect for obvious damage
Visually inspect seams, edges, valve, and the pump hose for tears or detached components. A quick visual check can reveal major problems before you proceed to more invasive fixes.
Tip: Use good lighting; angled shadows help reveal small flaws. - 3
Locate leaks with soap test
Mix dish soap with water and apply to suspected areas while the mattress is inflated or under gentle pressure. Watch for bubbling that indicates air escaping.
Tip: Work slowly and mark any bubbles with a small piece of tape. - 4
Patch detected leaks
Clean and dry the area, then apply patches from the repair kit on both sides of the patch for a secure seal. Allow the adhesive to cure as directed.
Tip: Use the strongest patch if multiple leaks are found. - 5
Re-inflate and test again
Inflate gradually to the recommended firmness, then monitor for air loss over 10–15 minutes. If no leaks are detected, proceed to regular use.
Tip: Don’t overinflate; excessive pressure strains seams. - 6
Check valve and connector seals
Ensure the valve is fully closed and seated. Inspect the connection between the pump and mouth of the mattress for gaps or looseness.
Tip: Sometimes re-seating the valve fixes subtle leaks. - 7
Prevent recurrence and plan next steps
Store properly, perform seasonal checks, and have a patch kit readily available. If issues recur, assess repair vs. replacement based on warranty and usage.
Tip: Keep an eye on signs of fatigue around seams.
Diagnosis: Air mattress won't inflate or deflates rapidly
Possible Causes
- highTiny puncture or seam leak
- highFaulty or weak electric pump
- mediumValve not sealing properly
- lowDamaged power cord or switch
Fixes
- easyTest power supply and pump with a known-good outlet and different adapter, if available.
- easyApply soap solution to seams, valve edges, and pump connections to locate leaks.
- easyPatch leaks with an appropriate repair kit; re-test after curing.
- mediumReplace defective pump or valve assembly if damage is confirmed.
- hardIf air loss persists after repairs, consider mattress replacement under warranty.
FAQ
Why won't my air mattress inflate even when the pump is running?
This usually means a leak, valve issue, or a compromised connection between the pump and mattress. Perform a leak test and inspect seals; replace faulty components if needed.
If the pump runs but nothing inflates, check for leaks, valve seals, and pump-to-mattress connections, then fix or replace as needed.
How can I tell if there is a leak in the mattress?
Look for hissing sounds and damp or bubbling spots with a soap solution. Mark the area and patch it with an appropriate repair kit.
Listen for air escaping and test with soapy water to locate the leak, then patch.
Can a faulty valve cause deflation even after patching?
Yes. If the valve doesn’t seal properly, air will escape even after patches. Re-seat or replace the valve as needed.
If the valve won’t seal, reseat or replace it to stop deflation.
What should I do if patches don’t hold?
Re-clean the area, use a different patch, and ensure complete curing time as directed by the patch kit. If leaks persist, replace the mattress.
If patches fail, try a different patch and consider mattress replacement.
Is it safe to use household cleaners on the mattress?
Stick to mild soap and water for cleaning. Avoid harsh chemicals that can degrade the material and adhesive patches.
Use mild soap and water; avoid harsh cleaners.
When should I replace an air mattress?
If leaks recur after repairs or the mattress loses air quickly, replacement is often more cost-effective, especially if under warranty.
If leaks keep coming back, it may be time to replace.
Watch Video
Highlights
- Identify leaks first with a soap test.
- Patch leaks or replace defective parts promptly.
- Verify pump and valve integrity before use.
- Inflate gradually and test for stability.
- Store and maintain to prevent future failures.