How to Clean a Mattress After Bed-Wetting: A Step-by-Step Guide
Learn a safe, effective method to clean a mattress after bed-wetting, remove urine odor, dry completely, and protect for future nights. Includes supplies, steps, and tips for parents and caregivers.

Goal: Learn a safe, effective method to clean a mattress after bed-wetting, neutralize odor, and prep the bed for future nights. You’ll blot the stain, treat with a urine-friendly cleaner, deodorize with baking soda, and ensure thorough drying before remaking the bed. Gather mild detergent, enzyme cleaner or white vinegar, baking soda, clean towels, and a fan or sunlight for drying.
Understanding Bed-Wetting and Mattress Care
According to Mattress Buyer Guide, bed-wetting is a common challenge for many families and does not reflect on parenting. The key to a quick, effective cleanup is to start with blotting to remove as much liquid as possible, then choose cleaning solutions that break down urine salts and neutralize odor without harming mattress materials. This section explains how moisture interacts with mattress layers, why prompt action matters for hygiene, and what you can expect as you begin the cleanup. By balancing practicality with safe, child-friendly products, you protect sleep quality and extend the life of the mattress. The Mattress Buyer Guide team found that a careful, methodical approach yields better odor control and faster drying, reducing the likelihood of mold or mildew when moisture sits.
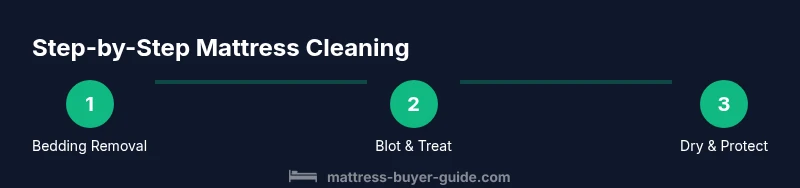
Immediate Cleanup Steps (First 10–15 Minutes)
Begin by removing all bedding and any washable covers, bringing them to the laundry. Place a waterproof cover or a clean sheet over the area to prevent further soaking if the incident recurs. Blot the mattress surface with clean towels, pressing firmly from the edge toward the center to absorb as much liquid as possible without rubbing the fabric deeper into the foam. If the spill is on a memory foam or latex mattress, avoid soaking the foam—excess moisture can take longer to dry and may damage the foam structure. By acting quickly, you reduce stain setting and odor formation.
Selecting Cleaning Solutions (What Works Best)
Use a gentle, urine-safe cleaner and avoid harsh chemicals that can irritate skin or degrade mattress materials. A simple solution of mild detergent and water works for light stains, but enzyme cleaners designed for urine provide superior odor removal by breaking down uric acid salts. If enzyme cleaners aren’t available, a small amount of white vinegar diluted with water can help neutralize odors. Always test any cleaner on a hidden area of the mattress first to ensure it won’t discolor or degrade the fabric or foam.
Enzyme Cleaners vs. Traditional Detergents
Enzyme cleaners are especially effective on organic stains because they target proteins and uric salts in urine. Traditional detergents remove surface dirt but may leave behind residues that contribute to odors. When using enzyme cleaners, apply according to the product directions and allow the cleaner to sit for several minutes to start breaking down the stain. For sensitive sleepers, choose child-safe or pet-safe enzyme products and vent the room to avoid inhaling concentrated fumes.
Deodorizing and Stain Removal Techniques
After the enzymatic treatment, lightly blot and rinse with a small amount of clean water, then apply a liberal dusting of baking soda over the affected area to absorb moisture and odor. Let the baking soda sit for at least 30 minutes; for stubborn odors, you can leave it longer (up to several hours) before vacuuming. Vacuum the baking soda completely using the upholstery attachment, ensuring all powder is removed before the mattress dries. This step helps prevent residual grit from grinding into fabric fibers during future use.
Disinfection and Odor Prevention Without Harsh Chemicals
Disinfection is usually not required for routine bed-wetting incidents, but if you want extra peace of mind, lightly mist the surface with water and apply a small amount of rubbing alcohol or hydrogen peroxide only to stain-free, non-foamed areas. Important: do not saturate foam layers with liquids, and avoid hydrogen peroxide on colored fabrics, as it can cause fading. Maintain good airflow by turning on a fan or opening windows, which accelerates drying and reduces the chance of musty odors.
Drying the Mattress Thoroughly and Drying Timeline
Thorough drying is the most critical step to prevent mold and mildew. After cleaning, press towels to absorb moisture and create as much airflow as possible. If weather permits, place the mattress in direct sunlight for 2–6 hours to naturally reduce moisture and odors; otherwise, use a fan or dehumidifier for several hours and flip the mattress to dry both sides. Remember, a damp mattress can take 12–24 hours or longer to dry completely depending on room temperature and humidity. Plan to keep bedding off for the full drying period.
Protecting the Mattress for Future Episodes
Once the surface is completely dry, install a high-quality waterproof or semi-waterproof cover that encases the entire mattress. This barrier helps prevent future moisture from soaking into the foam and makes nightly cleanups easier. Consider a breathable cover to avoid trapping heat or moisture. Regularly wash the cover and replace it when signs of wear appear. For ongoing bed-wetting management, a moisture-absorbing pad or mat beneath the sheet can add extra protection.
Cleaning the Mattress Pad and Bedding
Simultaneously clean the mattress pad, sheets, and any washable covers. Pre-treat stains on fabric with a mild detergent, then wash on a warm cycle using an appropriate detergent. Dry thoroughly before remaking the bed. Cleaning bedding separately prevents recontamination of the mattress and helps preserve cleanliness over time. If smells linger in fabrics, use a vinegar-based rinse or add a small amount of baking soda to the wash cycle.
Maintenance Routine and When to Replace
Create a simple routine: inspect the mattress area after incidents, promptly clean and dry, and replace hygiene-protective covers as needed. If bed-wetting episodes become frequent (e.g., multiple nights per week) and the mattress shows persistent odors or stains despite cleaning, consider evaluating the mattress for replacement or speaking with a pediatrician or sleep specialist to explore underlying causes. Maintaining a consistent routine extends mattress life and supports better sleep for your child.
Authority Sources and Practical References
For additional guidance on bed-wetting and pediatric sleep health, consult reputable sources and guidelines. This section provides external references to support the steps above and to offer broader context on managing nocturnal enuresis and mattress care.
Authority Sources
- NICHD (National Institute of Child Health and Human Development): https://www.nichd.nih.gov/health/topics/enuresis
- HealthyChildren.org (American Academy of Pediatrics): https://www.healthychildren.org/English/ages-stages/childhood/bed-wetting/Pages/default.aspx
- Mayo Clinic: https://www.mayoclinic.org/diseases-conditions/bed-wetting/symptoms-causes/syc-20352576
Tools & Materials
- Clean bedding (sheets, pillowcases, blankets)(Washable; start with fresh bedding.)
- Mild detergent(For spot cleaning and washing fabrics.)
- Enzyme cleaner (urine remover)(Child-safe or pet-safe; follow product directions.)
- White vinegar (optional)(Dilute with water for odor neutralization.)
- Baking soda(Absorbs moisture and odor.)
- Spray bottle(For applying cleaners evenly.)
- Clean towels or cloths(For blotting and wiping.)
- Vacuum with upholstery attachment(Remove baking soda and debris.)
- Fan or dehumidifier(Promotes fast drying.)
- Waterproof mattress cover(Adds protection for future incidents.)
Steps
Estimated time: 60-90 minutes
- 1
Remove Bedding and Clear Contaminated Items
Take off all sheets, blankets, and pillowcases. Gather soiled items for washing and set aside any accessories that touched the wet area. This initial removal reduces the amount of liquid the mattress soaks up and helps prevent spreading stains.
Tip: Have a dedicated laundry bin ready to avoid cross-contamination. - 2
Blot the Wet Area
Use clean towels to press and blot the surface, applying firm, steady pressure from the edge toward the center. Do not rub, which can push moisture deeper into layers. Repeat with fresh towels until no more liquid transfers.
Tip: Work from the outside edge inward to contain the stain. - 3
Contain the Spill and Check Drying Conditions
Move the mattress to a place with good air circulation. If possible, place it near a window or in a room with a fan to begin drying. Prevents moisture from seeping into adjacent areas and speeds up the process.
Tip: Open a window if humidity is low to improve air exchange. - 4
Pre-Treat Stains with Detergent
Mix a small amount of mild detergent with water and apply to the stained area. Gently dab rather than scrub to minimize fabric distress. This step helps loosen the stain before enzyme treatment.
Tip: Only use a light coating to avoid saturating the foam. - 5
Apply Enzyme Cleaner or Vinegar Solution
Spray enzyme cleaner over the area following the product directions, or apply a diluted white vinegar solution if enzyme cleaner isn’t available. Let it sit for 5–10 minutes to break down proteins in urine.
Tip: Ventilate the room to minimize strong odors during treatment. - 6
Rinse Lightly and Blot Again
Wipe away cleaner with a damp cloth, then blot with dry towels. Avoid soaking the mattress; you want to remove cleaner residues without saturating the foam.
Tip: Use a minimal amount of water to prevent over-wetting. - 7
Deodorize with Baking Soda
Sprinkle a generous layer of baking soda over the affected area to absorb remaining moisture and odors. Allow 30 minutes to several hours if needed for stubborn odors.
Tip: For best results, keep the area undisturbed during the sitting time. - 8
Vacuum Up Residue
Thoroughly vacuum the baking soda and any debris from the mattress surface using the upholstery attachment. Ensure no powder remains before drying.
Tip: Use slow, overlapping passes for complete removal. - 9
Increase Airflow and Begin Drying
Turn on a fan, use a dehumidifier, or place the mattress near a sunny window to accelerate drying. Plan for the full drying window, typically 12–24 hours depending on conditions.
Tip: Flip the mattress halfway through drying if possible. - 10
Protect the Surface with a Mattress Cover
Once dry, mount a waterproof cover that encloses the entire surface. A cover helps protect against future incidents and simplifies cleanups.
Tip: Choose a breathable cover to avoid heat buildup. - 11
Remake Bed with Clean Bedding
Wash and dry all bedding thoroughly before remaking the bed, ensuring the bottom sheet and mattress protector are properly aligned. Fresh sheets reduce the chance of odor transfer.
Tip: Rotate or replace stained or worn sheets as needed. - 12
Establish a Routine and Monitor Patterns
Create a simple routine to inspect and clean after incidents, and discuss nocturnal enuresis with a pediatrician if episodes persist. Regular maintenance keeps the mattress in good condition and improves sleep quality.
Tip: Track episodes to discuss with a clinician if frequency increases.
FAQ
Can I use regular laundry detergent on the mattress?
Regular laundry detergent is not designed for mattress surfaces and can leave residues. Use a mild detergent for spot cleaning and preferred enzyme cleaners for urine stains. Always test on a small area first.
Regular detergent isn't ideal for mattresses; use mild detergent for spots and enzyme cleaners for urine stains, after testing a small area.
Is hydrogen peroxide safe on memory foam?
Hydrogen peroxide can degrade some foam types and cause discoloration, especially on colored fabrics. Use only small amounts on non-foam surfaces or avoid altogether on foam mattresses.
Hydrogen peroxide can damage memory foam and cause color fading, so use it cautiously or avoid on foam.
How long does it take a mattress to dry after cleaning?
Drying times vary with room temperature, humidity, and airflow. Plan for at least several hours to a full day, and use fans or a dehumidifier to speed things up.
Drying usually takes several hours to a full day depending on conditions; fans help speed it up.
Should I apply baking soda after every cleanup?
Baking soda is helpful for odor absorption, but it’s not required after every cleanup. Use it when odors persist or after heavy wetting events, then vacuum it thoroughly.
Bake soda helps odors, but use it when odors linger and vacuum well afterward.
What if the stain returns after cleaning?
If a stain reappears after cleaning, reapply enzyme cleaner and allow longer sit time before drying again. Consider a professional cleaning if it persists, especially on expensive mattresses.
If the stain returns, reapply enzyme cleaner and let it sit longer before drying again.
When should a mattress be replaced after repeated episodes?
If stains or odors persist despite thorough cleaning, or if the mattress shows structural breakdown or mold signs, replacement may be the best option for health and sleep quality.
If odors persist or you notice mold or damage, consider replacing the mattress.
Watch Video
Highlights
- Blot quickly, then treat with urine-safe cleaners.
- Use enzyme cleaners for odor and stain removal when possible.
- Dry thoroughly with airflow to prevent mold.
- Protect future nights with a waterproof cover.
- Wash bedding separately and maintain a simple cleanup routine.