How to Mattress Stitch Garter Stitch: Step-by-Step Guide
Master the art of mattress stitch garter stitch seams with our comprehensive, beginner-friendly guide. Learn tools, step-by-step methods, finishing techniques, and troubleshooting to achieve a clean, flat seam every time.

You can join garter-stitch pieces with a mattress stitch by aligning the edges, threading a matching yarn, and sewing through the edge bars between garter ridges to create a nearly invisible seam. Keep tension even and match your gauge for a flat finish. This method supports blankets, scarves, and sweaters that use garter stitch blocks.
What is mattress stitch garter stitch and why it matters
In knitting, mattress stitch refers to a seam method designed to disappear into the fabric, creating a clean, professional join between two knitted pieces. When you are solving how to mattress stitch garter stitch, you're marrying the smooth finish of a seam with the crunchy texture and bouncy ridges of garter stitch. The challenge is that garter stitch creates tiny horizontal ridges that can catch light and reveal the seam if you apply too much tension or skip the edge bars. According to Mattress Buyer Guide, finishing touches matter almost as much as your chosen stitch pattern because a seam can make or break the overall look of a project, from a cozy blanket to a baby cardigan. By understanding how the garter pattern renders the seam, you can choose the right technique, yarn, and blocking method to achieve a nearly invisible join. In this section, you will learn the core idea behind mattress stitch garter stitch and why it matters for your finished piece.
Why garter stitch affects seam visibility
Garter stitch features raised horizontal ridges on every row, which can trap light differently than stockinette. When seaming, those ridges can either help the eye follow the seam or, if you pull too tightly, create a bulky edge that spoils the flat look. The mattress stitch technique works best when you align edges so that each garter ridge sits neatly next to its neighbor. Practicing this method reduces puckering and keeps the seam level with the fabric planes on both sides. For projects like blankets or baby cardigans, a well-executed mattress seam ensures the piece lays flat and wears well over time.
How garter stitch differs from stockinette in seaming
Stockinette seams rely on slipping stitches to hide the join, while garter stitch offers a more textured surface with predictable ridges. Mattress stitch for garter stitch takes extra care to align the edge bars that appear between ridges, so the seam sits flush against both pieces. The technique remains fundamentally the same, but you may need to adjust needle entry points to catch the correct bars and maintain even tension across the garter ridges. With practice, the seam becomes a nearly invisible line that preserves the garment’s stretch and drape.
Tools, yarn, and setup considerations
Before you begin, choose a yarn that matches the weight and fiber of your project. Use a blunt tapestry needle to minimize snagging and a length of matching or contrasting yarn for the seam. A comfortable setup includes a flat workspace, good lighting, and a few stitch markers to keep edges aligned. Blocking after seaming helps even out tension differences and solidifies the seam. If you’re new to mattress stitch garter stitch, practice on swatches with similar stitch counts and edge lengths to gain confidence before joining larger pieces.
Step-by-step overview for beginners
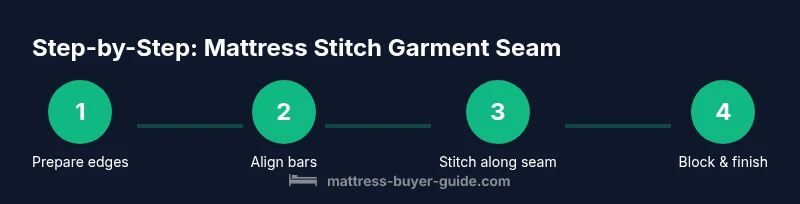
Think of the seam in terms of edge bars and garter ridges. Start by laying pieces flat with wrong sides facing up, aligning their edges. Thread your yarn and anchor at the start edge, then work across the seam by catching edge bars one by one, moving from one piece to the other in a mirrored pattern. Maintain consistent tension, and pause to adjust alignment if a ridge shifts. Finish with a few securing passes, weave in tails, and block to set the seam.
Common mistakes and how to avoid them
Tension that’s too tight makes the seam curl and puckers, while too loose tension creates a gap along the join. Skipping edge bars or only picking up every other bar can produce a jagged seam. Misalignment between garter ridges on opposite edges creates a visible mismatch. To avoid these issues, take small, deliberate stitches, keep both pieces aligned, and check the seam frequently as you work. Practice on swatches before tackling a blanket or garment.
Finishing touches: blocking and weaving in ends
Blocking after seaming helps the seam settle and can erase minor tension differences. When weaving in ends, use a blunt tapestry needle to thread tails along the seam’s backside, tucking the end into garter ridges so it’s invisible from the front. Trim any loose ends close to the fabric, then re-block if needed. Proper finishing yields a professional look that lasts through wear and washing.
Troubleshooting tricky joins and colorwork
Color changes introduce extra considerations: work the seam so that color transitions don’t pull tight along the edge. If you’re joining garter stitch panels with different colors, adjust tension at color changes and consider using a repeating edge-bar pattern to disguise the join. For highly textured garter patterns, you may prefer a mattress seam that emphasizes the fabric’s texture rather than concealing it. If puckering occurs, rework the seam with lighter tension and recheck alignment.
Tools & Materials
- Tapestry needle (blunt-end)(Choose a needle with a large eye and a blunt tip to avoid snagging stitches)
- Matching weight yarn for seaming(Use a yarn that complements your project in weight and fiber)
- Scissors(Small, sharp pair for clean cut tails)
- Additional yarn for anchors (optional)(Helpful for securing ends during seaming)
- Blocking mats or pins(Used after finishing to set the seam)
Steps
Estimated time: 30-60 minutes
- 1
Prepare edges and orientation
Lay the two knitted pieces with their wrong sides facing up. Align the edges so that the seam line will run straight. This alignment ensures the bars you’ll catch sit evenly and the join remains flat.
Tip: Use a few stitch markers to hold corners in place while you check alignment. - 2
Thread and anchor your seam yarn
Cut a tail of seam yarn long enough to run the length of the seam. Thread the tapestry needle and anchor at the start edge of the first piece to prevent slipping as you begin.
Tip: Leave a longer tail at the start to tie off securely later. - 3
Identify the correct edge bars
For garter stitch, edge bars occur between ridges. Position the needle to pick up the bar that lies closest to the seam line on both pieces. This is what creates the nearly invisible join.
Tip: Practice on swatches to feel where the bars sit before you seam a real project. - 4
Insert through the first edge bar
Insert the needle from front to back through the first edge bar on one piece, then pull the yarn through toward the opposite piece, leaving the yarn to form a small, tidy stitch.
Tip: Keep the needle parallel to the seam to avoid skewing the pieces. - 5
Cinch the bar and level the seam
Pass the needle through the corresponding bar on the other piece. Draw gently so the bar sits flush with the fabric rather than pulling the edge tight.
Tip: If you see a gap, adjust by slightly easing the tension on the previous stitch. - 6
Continue across the seam in a mirrored pattern
Continue catching edge bars in order, moving from one piece to the other to form a continuous chain along the seam. Maintain consistent tension to avoid lumps.
Tip: Pause occasionally to realign edges and check that ridges line up. - 7
Finish the seam and secure the tail
When you reach the end, secure the final stitches and snug the last few passes. Weave the yarn tail back through several stitches to anchor it.
Tip: Leave a small end to weave in with the starting tail for extra security. - 8
Weave in ends neatly
Thread the tails into the back of the work, weaving along the garter ridges to avoid showing on the front.
Tip: Trim ends close to the fabric to reduce bulk and snagging. - 9
Block the completed piece
Gently block the fabric to set the seam. This helps even out tension and makes the seam lie flat.
Tip: Use a light steam or mild water spray as appropriate for your yarn. - 10
Inspect and adjust if needed
Look at the seam from multiple angles. If you notice puckering or gaps, recheck tension and adjust with a small extra pass if necessary.
Tip: A well-blocked seam should disappear visually and feel seamless when run your hand along the join.
FAQ
What is mattress stitch garter stitch and when should I use it?
Mattress stitch garter stitch is a seam that hides within garter-pattern fabric to join two pieces cleanly. It’s ideal for blankets, scarves, and garments where a flat, discreet seam is desirable.
Mattress stitch garter stitch is a near-invisible seam used to join garter-pattern pieces, great for blankets and scarves.
Can I use this seam on colorwork or variegated yarns?
Yes, but you may need to adjust tension at color changes and consider a slightly looser seam to accommodate color breaks without creating tension spots.
You can, but manage tension at color changes to keep the seam smooth.
Is blocking required after seaming garter stitches?
Blocking helps set the seam and even out tension differences. It’s recommended for most garter-seamed projects.
Blocking is recommended to set the seam and even out any tension variations.
How do I fix a puckered seam in garter stitch?
If puckering appears, redo the seam with gentler tension and ensure edge bars are correctly picked up. Blocking afterward can help smooth any residual puckering.
Redone seam with gentler tension and correct edge bars; blocking can help smooth it out.
Can mattress stitch be used with different stitch patterns beside garter?
Yes. Mattress stitch can join many stitch patterns, but you’ll adjust the bar-picking technique to fit the specific texture of the fabric.
It works with many stitches; adjust bar-picking for your pattern.
What are common signs of a well-executed seam?
A well-executed seam lies flat, is nearly invisible, and the fabric on both sides looks continuous without obvious gaps.
Flat, nearly invisible seam with no gaps on either side.
Watch Video
Highlights
- Align edges precisely for a smooth seam
- Maintain even tension to avoid puckering
- Catch the correct edge bars between garter ridges
- Block after seaming to set the finish
- Weave in ends neatly for a clean look