How to Mattress Stitch Granny Squares: A Practical Crochet Guide
Master the mattress stitch join for granny squares with a clear, step-by-step approach. Learn tension, alignment, and finishing techniques to create seamless, durable crochet projects.

Learn how to mattress stitch granny squares to join motifs cleanly and securely. This method hides seams for a nearly invisible finish and creates a durable edge. It works best when your squares are close in size and tension is consistent across pieces. With practice, your afghan edges will look seamless.
What is Mattress Stitch for Granny Squares?
In crochet, the mattress stitch is a technique used to join two or more granny squares with a nearly invisible seam. Unlike visible slip stitches or crude edges, mattress stitching weaves the seam from the back, letting the stitches on the front align like a clean grid. For a project sized as a blanket or a pillow cover, this method minimizes bulky lumps and keeps the fabric flat. When you search for how to mattress stitch granny squares, you’ll see that success hinges on consistent gauge, even tension, and matching square sizes. The Mattress Buyer Guide team notes that consistent tension across squares helps the final piece drape well. Practice on a small swatch before committing to a larger project to nail the rhythm of the stitch and prevent puckering.
Key Principles: Tension, Alignment, and Yarn Choice
The heart of a neat mattress stitch lies in three factors: tension, alignment, and yarn compatibility. Maintain even, moderate tension so the seam lies flat without distorting the grid of stitches on either side. Align edges precisely; don’t rush past row lines or you’ll create a visible zigzag along the join. Use the same brand and weight of yarn for all squares to ensure uniform feel and behavior when blocked. If you must mix fibers, test first on a small sample because differences in elasticity can cause gaps or ripple. The Mattress Buyer Guide team recommends a light, smooth yarn and a neutral color that blends with both squares to reduce visual breaklines.
When to Use Mattress Stitch Over Other Seams
Choose mattress stitch when you want a clean, barely-there join that sits flush with the fabric surface. It is ideal for joining identical granny squares edge-to-edge in blankets, cushions, or wall hangings. Avoid it for rigid or bulky yarns where a seam might feel stiff; in those cases, a traditional slip stitch seam or crochet seam may be more forgiving. Mattress stitch excels for projects where the border edges align, and the grid lines show minimal distortion. The result is a professional finish that looks as if the blocks grew together.
Prep: Tools, Materials, and Workspace Setup
Before you begin, set up a comfortable workspace with bright light and a flat surface. Gather your squares, a tapestry needle, matching yarn tail, scissors, and a few stitch markers if you find them helpful. Having a friend hold the pieces in place or using a blocking mat to keep edges straight can prevent misalignment. Ensure your squares are already lightly blocked so the edges sit flat and uniform. The right preparation can dramatically reduce the number of repeats needed while joining, saving time and frustration.
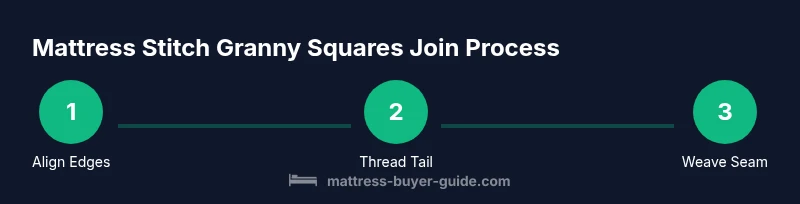
Step-By-Step Conceptual Overview
Think of mattress stitch as a back-and-forth pull that hides itself behind the front-facing stitches. You'll align two edges, insert your needle through corresponding back-edge loops from the opposite sides, and pull through to form a neat seam. Move methodically across the entire edge, checking frequently that stitch counts and grid lines align. Stop occasionally to smooth out the join and verify there are no gaps. The overview below breaks the process into actionable stages that you’ll translate into the step-by-step instructions that follow.
Troubleshooting Common Issues
Gaps and loose seams often come from uneven tension or misaligned edge stitches. If you notice a gap, slow down and recheck alignment before continuing. Puckering can happen when you pull too tightly; loosen your grip a bit and try again. Small differences in square size can create drift along a seam; if this occurs, pull slightly away from the affected area and re-sew to bring the grid back inline. Blocking after joining helps set the seam and reduce ripple. Remember, practice on a scrap swatch to calibrate tension and tension balance across pieces.
Variations: Invisible vs Decorative Mattress Stitch
The classic mattress stitch aims for invisibility, with the seam staying hidden behind the front surface. You can adjust for a decorative effect by subtly widening the stitch width or using a contrasting color to emphasize the seam lines. Another variation is to alternate the seam direction (horizontal vs vertical passes) in larger projects to reduce any stretching bias. Choose the approach that best suits your project size, yarn amount, and aesthetic goals.
Finishing Touches: Weaving in Ends and Blocking
After joining, weave in all yarn tails using a tapestry needle, tucking them into the fabric through the nearest stitches rather than the seam path to avoid creating bulk. Lightly block the finished piece to settle stitches and even out any slight irregularities. Blocking is especially useful for blankets that will be washed frequently, or for cushions that must maintain a crisp edge. Use gentle heat and steam as appropriate for your yarn type and fiber content.
Caring for Your Granny Square Projects
To keep your joins looking crisp, wash delicate items by hand or on a gentle machine cycle with mild detergent. Air-dry flat rather than wringing or twisting. If you typically block after joining, consider re-blocking after a few washes to refresh the seam alignment. Store finished pieces flat to preserve the stitch grid and prevent distortion after long storage.
Tools & Materials
- Tapestry needle(Size 18–22 (roughly 0.9–1.0 mm eye). Essential for weaving through seam edges cleanly)
- Matching yarn tail(A length long enough to sew across the seam (about 1–2 yards per seam, depending on project size))
- Scissors(For trimming ends after weaving and finishing steps)
- Blocking mats or foam tiles(Helpful to flatten and even edges before joining and after assembly)
- Stitch markers(Optional for keeping track of rows when joining longer runs)
- Same-weight yarn (optional for test swatch)(Use a small swatch to dial in tension and gauge before joining a full project)
Steps
Estimated time: 60-120 minutes
- 1
Align edges of the squares
Place the two granny squares with right sides facing you and the edges to be joined aligned. Verify that the grid lines run parallel and that each corner lines up. Small misalignment at the start can cause the entire seam to skew, so take a moment to line up precisely.
Tip: Use a light touch when rearranging; a gentle nudge is enough to align stitches without distorting edges. - 2
Prepare your needle and thread
Thread your tapestry needle with a length of yarn equal to the tail at the edge you’ll start with. Secure the end by weaving a small hap across the back of the work, then begin from the back side of the seam edge to maintain invisibility.
Tip: Leave a tail long enough to secure the first few passes; this prevents the seam from migrating as you start. - 3
Start the first anchor pass
Insert the needle under the back edge stitches at the seam line from one square, then under the corresponding back edge stitches of the other square. Draw through until snug, but not tight. This first anchor sets the seam alignment.
Tip: Keep your needle close to the edge to minimize visible gaps on the front surface. - 4
Continue along the seam
Work stitches across the entire edge, catching only the back loops of both squares. After each pass, gently pull to even tension and check alignment of the grid lines. Maintain a steady rhythm to avoid creating tight or loose spots.
Tip: Pause after every few stitches to verify that the front remains flat and the grid lines align. - 5
Finish the seam and secure
When you reach the end of the edge, weave the remaining yarn tail through the nearby stitches to secure. Clip the tail close and weave it in so it sits flat against the fabric.
Tip: Run the end through a few stitches in opposite directions to prevent fraying. - 6
Check tension and alignment
Gently press the joined area and inspect for any puckering or gaps. If issues appear, loosen the seam slightly and rework the nearby stitches. The seam should lie flat and disappear into the fabric.
Tip: Blocking after joining can help set tension and reduce minor irregularities. - 7
Repeat for remaining edges
If joining more than two squares, repeat the process along each adjoining edge, following the same tension and alignment checks. Maintain consistency across all joins to ensure a cohesive final piece.
Tip: Work in a consistent direction (left-to-right or top-to-bottom) to avoid stitch density differences between rows. - 8
Weave in ends and finish
Weave in any remaining yarn tails and lightly block the completed piece if needed. This final step helps ensure the stitches lay flat and the seam remains invisible.
Tip: Avoid over-wetting; a light mist and air-dry is often enough for most cotton or acrylic blends.
FAQ
What is mattress stitch in crochet and when should I use it?
Mattress stitch is a method for joining granny squares from the back to create a nearly invisible seam on the front. Use it when you want a flat, uniform join for blankets or cushions. It works best with identical squares and consistent tension.
Mattress stitch joins granny squares from the back, giving a nearly invisible seam on the front. Use it when you want a flat, uniform join for blankets or cushions.
Can I mattress stitch different yarn weights?
Mixing yarn weights can lead to visible variations in tension and seam density. If you must mix weights, test on swatches first and adjust your stitching speed to maintain even tension.
Mixing yarn weights can cause tension differences, so test on swatches first and adjust as needed.
Why do my joins look puckered or have gaps?
Puckering usually means tension is too tight or edges are uneven. Gaps indicate misalignment. Recheck edge alignment, loosen the seam slightly, and resew the problematic area. Blocking afterwards can help even things out.
Puckering means tension is too tight; gaps mean misalignment. Recheck and resew the area, then block if needed.
Should I block before joining granny squares?
Blocking before joining helps edges sit flat and align evenly, which makes the mattress stitch easier and results in a cleaner seam.
Blocking before joining helps edges sit flat and makes the seam neater.
Is mattress stitch stronger than slip stitch?
Mattress stitch generally yields a stronger seam and a flatter finish than slip stitches, because it distributes tension evenly along the seam rather than creating a raised line.
Mattress stitch is typically stronger and flatter than a slip stitch seam.
How do I hide yarn tails after joining?
Weave tails into the back of the work, running them through several stitches in different directions. Trim close to the fabric without cutting the stitches themselves.
Weave tails into the back, then trim close to the fabric to keep the seam neat.
Watch Video
Highlights
- Join granny squares with even tension for a flat seam.
- Align edges precisely before stitching to avoid skew.
- Block after joining to set the seam and improve drape.
- Weave in ends securely to prevent unraveling.