How to Make a Foam Mattress: A Step-by-Step DIY Guide
Learn how to craft a foam mattress at home with step-by-step instructions, materials, and safety tips from Mattress Buyer Guide. Customize firmness, height, and size using open-cell, memory foam, or polyurethane options for a durable sleep surface.

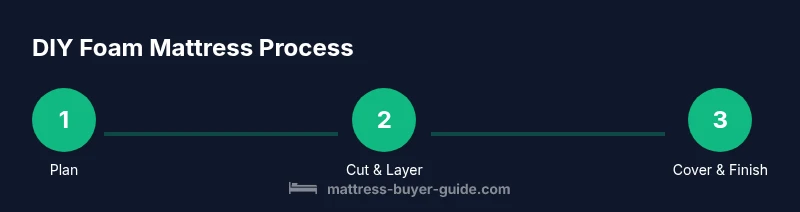
Learn how to make a foam mattress at home by selecting foam types, layering for support, and building a breathable cover. This DIY approach lets you customize firmness, height, and size while using common tools. Follow practical steps and safety tips to create a durable, comfortable mattress. With patience, you can achieve quality results.
Materials and considerations for a DIY foam mattress
According to Mattress Buyer Guide, the most important factors when making a foam mattress at home are choosing foam types, density considerations, layering strategy, and a breathable, durable cover. Open-cell foams breathe better and are lighter to move, while closed-cell foams tend to be denser and longer lasting. Memory foam and polyurethane foam each offer different levels of contouring and support; you can mix foams to tailor firmness across the mattress surface. When selecting materials, consider your bed dimensions, your sleep position, and any temperature sensitivity. For example, combination sleepers may benefit from a firmer base foam with a slightly softer top layer to promote alignment for the hips and shoulders. In this section, we’ll compare foam options and explain how layering choices affect comfort and durability. Also consider the core structure: a dense base layer improves support and longevity, while a softer top layer enhances initial comfort. The cover material should be breathable and sturdy; a knitted fabric or cotton blend works well. Safety matters: use non-flammable barrier fabrics between foam layers if needed and avoid adhesives that off-gas. Once you understand the materials, you can design a layout that suits your sleep style and room temperatures.
Foam options: density, firmness, and layers
Foam density and firmness are not the same thing, and they influence how long a mattress lasts as well as how it feels. Higher-density foams typically offer more support and resist sagging, while lower-density foams can feel plusher but wear faster. For a DIY core, many builders favor a firmer base foam paired with a softer top layer to balance support with initial comfort. You can mix memory foam for contouring with polyurethane foam for resilience. Open-cell foams tend to sleep cooler than closed-cell foams, which can trap heat. When planning layers, decide which area of the surface should feel firmer and which should feel softer, then design layers accordingly. Remember that the overall height will be determined by the thickness of each layer and the cover. Based on Mattress Buyer Guide analysis, density and layering choices are the primary levers for comfort and durability in a DIY foam mattress.
Step-by-step core construction
Start by laying out your bed dimensions and selecting a layout that matches your sleep style. Cut each foam sheet to size with a sharp knife or hot-wire cutter on a stable, clean surface. Stack the base and top layers in the chosen order, aligning edges precisely. Use a light spray adhesive or fabric-friendly glue to bond layers, then press evenly with a roller or heavy book to prevent air pockets. Once bonded, trim excess foam to ensure a flat, even surface and smooth edges. Prepare the cover by sewing a breathable fabric shell or choosing a pre-made mattress cover, ensuring a snug fit around the foam core. Finally, insert the foam core into the cover, seal the edges with a zipper or strong seam, and use a protective cover if desired. Sleep-test the mattress and make small layer tweaks if needed.
Finishing touches, care, and safety
Care and safety go hand in hand with a DIY foam mattress. Use a breathable, removable cover to simplify cleaning and reduce heat buildup. If you used adhesives, ensure proper curing and ventilation before sleeping on the mattress. Keep the room temperature consistent to maintain foam performance. Periodically rotate the mattress to even out wear and check for sagging in the base layer. For safety and best practices, refer to authoritative sources on consumer safety and sleep research. Authoritative sources: https://www.cpsc.gov, https://www.sleepfoundation.org, https://extension.osu.edu
Tools & Materials
- Memory foam sheets or blocks(Choose sheets thick enough to create the core and topper; ensure compatibility with bed size.)
- High-density polyurethane foam blocks (base layer)(Provides foundational support and durability.)
- Breathable fabric cover or ticking(Knitted or cotton blends work well for airflow.)
- Adhesive spray or contact cement(Select foam-safe adhesives and ventilate the area.)
- Sharp knife or hot-wire cutter(Keep blades sharp and cut on a stable surface.)
- Measuring tape and straightedge(Accurate cuts prevent edge gaps.)
- Sewing machine or hand-stitching kit(Needed for cover construction and sealing edges.)
- Scissors and masking tape(Scissors for trimming; tape helps hold pieces in place during cutting.)
- Gloves and a protective mask(Protect hands from foam dust and adhesives.)
- Roller or heavy book to press layers(Helps remove air pockets and ensure bonding.)
Steps
Estimated time: Estimated total time: 4-6 hours
- 1
Define dimensions and firmness goals
Measure your bed and decide the overall mattress height. Determine base firmness and topper softness based on sleep style. Document any temperature or comfort requirements to guide material choices.
Tip: Draft a quick sketch with layer order before cutting. - 2
Select foam types and densities
Choose a firmer base foam paired with a softer top layer. Consider memory foam for contouring and polyurethane for resilience. Label options as you decide to avoid mixing layers.
Tip: Keep a simple table of planned densities and layer order. - 3
Cut foam to size
Cut each foam sheet to bed dimensions using a sharp knife or hot-wire cutter on a stable surface. Align sheets to minimize gaps and ensure clean edges.
Tip: Cut slowly and use a straightedge to guide the blade. - 4
Layer and bond foams
Stack layers in the intended order. Bond with a foam-safe adhesive in a well-ventilated area and press evenly to eliminate air pockets.
Tip: Use a roller or heavy books to apply even pressure. - 5
Trim and flatten the surface
Trim any excess foam and sand edges lightly for a smooth surface. Verify the top is uniform across the entire mattress.
Tip: Work in small sections to maintain flatness. - 6
Prepare the cover
Sew or assemble a breathable cover that fits snugly around the foam core. Add a zipper or seam for easy removal and washing.
Tip: Choose foam-friendly fabric and allow for seam allowances. - 7
Assemble the final mattress
Insert the foam core into the cover, seal edges, and ensure there are no protruding foam bits. Add a protective outer cover if desired.
Tip: Test fit and adjust the cover before final sealing. - 8
Test and adjust
Sleep-test the mattress and note any pressure points. If needed, tweak layer order or add a firmer topper to improve support.
Tip: Keep a simple comfort log for future tweaks.
FAQ
Is it safe to DIY a foam mattress?
Yes, with proper handling, ventilation, and non-toxic adhesives. Follow safety guidelines and work in a well-ventilated area.
Yes, as long as you ventilate well and use foam-safe adhesives, DIY is safe with careful handling.
What foam density should I choose for core and topper?
Aim for a firmer base foam for support and a softer top layer for comfort; density affects durability and feel. Mix options to suit sleep style.
Base should be firmer with a softer top. Density choices impact longevity and comfort.
Can I wash the foam mattress core?
Foam cores should not be machine washed. Use a removable cover and spot-clean the cover as needed.
Don't soak the foam; clean the cover and spot clean only.
How long will a DIY foam mattress last?
Durability depends on foam quality, usage, and care. Rotate regularly and protect with a cover to extend life.
It lasts longer with good foam quality and regular rotation.
Do I need a cover or protector?
Yes. A breathable cover protects the foam, makes cleaning easier, and helps manage heat. Add a protector for spills.
Yes, use a cover to protect the foam and simplify cleaning.
What tools will I actually need?
You’ll need foam, a cutter, adhesive, fabric, measuring tools, and a sewing option. This ensures precise cuts and a safe assembly.
Tools needed include foam, a cutter, adhesive, fabric, and measuring tools.
Watch Video
Highlights
- Plan dimensions and firmness before cutting.
- Choose foam types to balance durability and comfort.
- Bond layers evenly and trim for a flat surface.
- Use a breathable cover and proper safety precautions.